


 New Code Sent!

6 KITCHEN LAYOUT STYLES: SIMPLIFYING YOUR COOKING SPACE
Let's face it, planning your ideal kitchen design can feel like solving a puzzle with too many pieces. But don't worry, with a bit of help, you can quickly figure out the best kitchen layout for your space and needs. The right kitchen arrangement can help ensure pots and pans are right where you need them, pathways are clear, and cleanup is a breeze. If you’re wondering what are the different types of kitchen layouts, check out these 6 common layouts that prioritize function over fuss, helping you spend less time wrestling with meal prep and more time where you belong–outside of the kitchen.

1. ONE-WALL KITCHEN: THE SPACE-SAVING WORKHORSE
Ideal for small apartments or open-concept spaces, this kitchen room layout packs everything into a single wall. While it saves on square footage, be mindful of limited counter space—strategic wall-mounted storage and compact appliances, such as this compact over-the-range microwave from Maytag brand, help keep it functional. This is a great layout if you’re working with tight kitchen floor plans. When used in open living room and kitchen floor plans, you can add a roll away island or dining table to extend the kitchen work space and add seating.

ONE-WALL KITCHEN APPLIANCE PLACEMENT TIPS:
Place the sink in the middle, with the dishwasher next to it
Position the refrigerator on one end and the range on the other
For kitchens with cooktops, add a wall oven, like these from Maytag brand

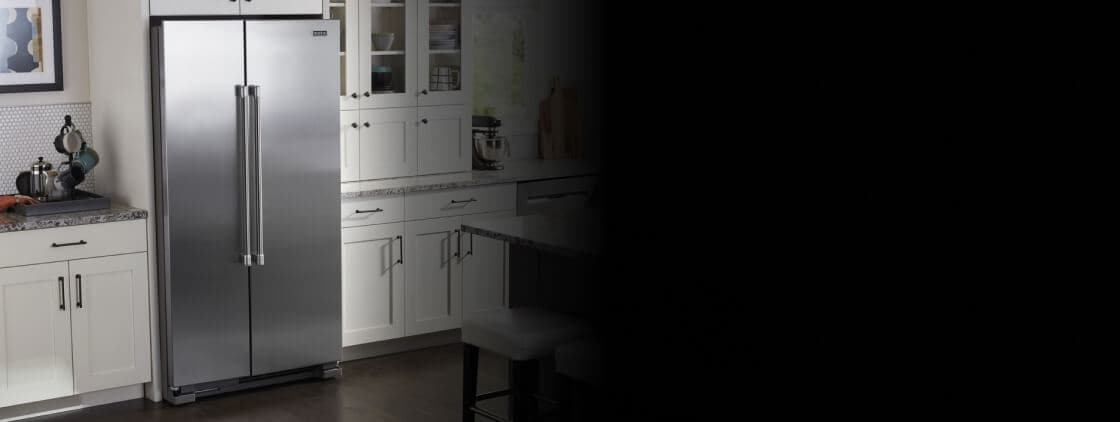
2. GALLEY KITCHEN: ONE OF THE MOST EFFICIENT KITCHEN LAYOUTS
This common kitchen layout features two parallel walls to create a no-nonsense workspace that’s easy to navigate. This is often considered the most efficient kitchen layout in terms of the footprint needed and storage/workspace gained. The close proximity of appliances and work zones also makes it efficient for you since you won’t waste steps moving between tasks. The galley kitchen design is great for solo cooks, though the narrow walkway can feel cramped if multiple people try to help (or raid the fridge). Install sliding cabinets or open shelving to help maximize every inch in this efficient kitchen layout. The galley layout is the ideal kitchen design for spaces that are long and narrow.

Appliance Placement Tips:
The ideal galley kitchen layout features the sink and dishwasher on one wall in the middle, with the range and refrigerator on the other wall on opposite ends. This creates a triangle between appliances with a logical progression from one to the other.
Place the refrigerator at the end near a doorway or opening so it’s accessible to other household members even when you’re cooking.
Keep your microwave placement strategic—over-the-range models help save countertop space and select models, such as this one from Maytag brand, can double as a range hood.
Opt for counter-depth refrigerators that sit flush with your cabinetry and help streamline narrow galley kitchens.
Counter-depth refrigerators from Maytage brand are designed to blend seamlessly with cabinets, giving your kitchen a sleek, cohesive look. Select Maytag® models include the PowerCold® feature, which gets everything in your refrigerator back to nice and cold, nice and quick. Check out this refrigerator size guide to find the right fit for your kitchen layout.

3. L-SHAPED KITCHEN: THE VERSATILE CORNER
Another popular and common kitchen layout type is the L-shaped kitchen. This layout uses two adjacent walls to create an L shape, leaving room for an island if your space allows. While the corner cabinets can be awkward, pull-out shelves or lazy-susans help solve the problem. The open design works well for open living kitchen floor plans, though larger spaces might waste some floor area.

L-SHAPED KITCHEN APPLIANCE PLACEMENT TIPS:
Position the refrigerator at the end of one leg of the “L”
Place the sink in the corner for maximum counter space on both sides
Install the range on the opposite leg from the refrigerator
If adding an island, consider a prep sink or cooktop, like these models from Maytag brand, installed on it to make the space even more useful

What appliance colors work in your kitchen?

What is the kitchen triangle rule?

4. U-SHAPED KITCHEN: THE WORK TRIANGLE MASTER
Three walls of storage and appliances create an ultra convenient kitchen in a U shape with lots of storage. Just ensure your kitchen cabinet layout wraps around all three walls to make the most of this design. The U-shape, also known as a horseshoe kitchen layout is the ideal kitchen design for creating a work triangle—widely considered the most work-efficient appliance arrangement. Keeping the overall footprint of your kitchen around 100-150 sq ft. can help keep everything within reach and maximize the efficiency of moving from task to task.

U-SHAPED KITCHEN APPLIANCE PLACEMENT TIPS:
Put the sink in the center of the "U" base
Place the refrigerator and range on opposite sides of the "U"
Alternatively, use one wall for a cooktop and wall ovens to create a cooking zone
If adding an island, place it outside of the U to keep traffic flow open

5. G-SHAPED KITCHEN: THE STORAGE POWERHOUSE
This type of kitchen layout is like a U-shape with an extra peninsula, offering maximum storage but requiring significant square footage. Best for large families or those who bulk-shop, the G-shaped kitchen also creates an opportunity for a few seats at the peninsula. Just make sure your appliance placement doesn’t create a traffic jam between the fridge and stove.

APPLIANCE PLACEMENT TIPS:
Put the main sink in the center of the longest run with the dishwasher nearby
Place the refrigerator at one end of the “G”, preferably near the entrance to your kitchen for easy access for the rest of the household
Install the range on one of the side walls
Keep appliance door/drawer clearance unobstructed by avoiding placement near the peninsula

6. PENINSULA KITCHEN: THE SPACE-SAVING ISLAND ALTERNATIVE
This type of kitchen layout features what is essentially an island connected to a wall. A peninsula adds prep space without requiring a large footprint. Use it to separate cooking areas from living spaces in open floor plans, but keep traffic flow in mind—you don’t want a bottleneck during dinner rush. Pack in extra cabinetry and add a range to the peninsula, such as these slide-in ranges from Maytag brand, to create a sort of open concept U-shaped kitchen, or keep the peninsula clear for extra countertop work space and seating.

PENINSULA KITCHEN APPLIANCE PLACEMENT TIPS:
Follow the L-shaped kitchen layout placements, or to utilize the peninsula as an extra appliance station, follow U-shaped recommendations
Keep the main sink on the perimeter, close to the dishwasher
Position the refrigerator at the end of a run for easy access
Consider a wall oven separate from the cooktop for more flexibility
SHOP MAYTAG® WALL OVENS
Maytag® Wall ovens can free up valuable floor space and can be installed at ergonomic heights. These ovens are available as singles, doubles or combinations and select models feature No-Preheat Air Fry, which eliminates the preheat process and cooks fried foods fast.


KITCHEN ISLANDS: TO ADD OR NOT TO ADD?
Kitchen layouts with an island can be a game-changer, providing extra workspace, storage, and even casual seating. But before you jump on the island bandwagon, consider your space's size and kind of kitchen layout. To comfortably fit an island, your kitchen should be at least 13 feet wide. Stick to slim islands in tighter spaces—you don’t want to create an obstacle course. For seating, consider counter-height vs. bar-height options based on your household’s needs.
WHEN TO CONSIDER AN ISLAND
Your kitchen is at least 13 feet wide
You have enough clearance (at least 36 inches) on all sides
You need additional storage or counter space
You want to add a casual dining area or gathering place
ISLAND KITCHEN LAYOUT DESIGN: WHICH KINDS OF LAYOUTS WORK BEST?
Larger L-shaped and U-shaped kitchen layouts work best with an island. Islands can be placed within the L to create a third counter and keep your guests right in the middle of the action. U-shaped kitchen islands should be placed outside of the U as an open fourth side and to avoid interrupting the flow between workzones. An island can also be a great addition to an open concept single-wall kitchen, providing more work space as well as helping to separate the kitchen from the rest of the area.
KITCHEN ISLAND ALTERNATIVES
If your kitchen is too small for a full-sized island, consider these alternatives:
Peninsula: Extends from a wall or cabinet, offering similar benefits to an island
Rolling cart: Provides flexibility and can be moved as needed
Narrow console: Adds extra counter space without taking up too much room


HOW DO YOU DESIGN A SQUARE KITCHEN LAYOUT?
A U-shaped kitchen effectively utilizes available wall space in a square kitchen layout to maximize storage. However, this might create tight spaces that are better for one cook at a time. An L-shaped or galley square kitchen layout can open up the space to allow for multiple cooks. If one side of your square kitchen layout is open to adjacent rooms, consider a G-shaped kitchen to pack in even more storage and countertop space while providing seating and room for socializing.
Maytag® refrigerators
Built strong to hold in the cold
Maytag® refrigerators are designed to help keep your perishables in their ideal climate
CREATING A SPACE-EFFICIENT KITCHEN LAYOUT
The key to a functional kitchen is creating an efficient workflow. Here are some tips to help you achieve this.
CONSIDER ORDER OF OPERATIONS
When you plan your kitchen layout, it can help to start by thinking about the order in which you do things. When cooking, you’ll usually start at the fridge to gather ingredients, then move to a prep and clean space near the sink. Finally, you’ll cook your food using a stove or the oven. You might also need to grab additional ingredients or quickly clean something in between. This is where the idea of the kitchen work triangle comes in. Consider placing the three main work areas—the sink, refrigerator and stove—in a triangular layout that makes moving between them easier. This arrangement helps minimize unnecessary steps and helps create a smooth flow of traffic.
ZONE PLANNING
Take the triangle concept a step further by grouping kitchen tools and supplies according to the task at hand:
Prep zone: Open countertop space between fridge and sink with knives, cutting boards and other prep tools in cabinets underneath
Cooking zone: Group pots, pans, spices and oils around the stove and oven
Cleaning zone: Place dishsoap, sponges, colanders and more near the sink and dishwasher
Storage zone: Include pantry space and cabinets with freezer bags, storage containers and more near the fridge
TRAFFIC FLOW
Ensure there's enough space in your ideal kitchen design for people to move around without disrupting the cook, or for multiple cooks to share the space. Aim for at least 36 inches of walking space in main thoroughfares. Consider door clearances, including for appliances placed near an island to avoid creating bottlenecks.
WHAT IS THE 3X4 KITCHEN RULE?
When it comes to your kitchen layout, the 3x4 kitchen rule recommends three separate 4-foot counters for efficient cooking. Each counter serves a distinct purpose, helping to prevent cross-contamination of raw and cooked foods or dirty and clean dishes. This system can help optimize workflow by creating dedicated spaces for food preparation, cooking and cleaning. This rule is often easier to achieve in larger, U-shaped kitchens or L-shaped kitchen layouts with an island.

QUICK TIPS FOR ANY LAYOUT
No matter what kitchen layout you choose, here are some tips to maximize your kitchen's functionality:
Choose appliances that fit your space: Researching appliance sizes is a good starting point when planning your kitchen layout. Knowing how much space you’ll need for each appliance can help you determine the best kitchen layout for your available area.
Vertical space is your friend: Use wall space for racks, shelves and additional cabinetry. Consider tall cabinets that go to the ceiling, or incorporate storage baskets on top of them. Integrate a range hood, like these models from Maytag brand, to save space above your stovetop.
Lighting matters: Bright overhead lighting can help you find what you need faster while under-cabinet LEDs eliminate shadowy work zones. Look for range hoods and microwave hoods with LED lighting, like this model from Maytag brand, to provide stovetop illumination.
Have an appliance placement strategy: Choose counter-depth models for a streamlined look, which is ideal for narrow kitchens. Opt for built-in appliances like wall ovens if counter space is limited. Place your storage, cooking and cleaning appliances in a triangle formation to help eliminate unnecessary steps and group related tools and supplies near them.
Remember, the ideal kitchen layout is one that works for you. It should make your daily kitchen tasks easier and more time or space efficient, allowing you to spend less time cooking and cleaning and more time enjoying your home.
SHOP MAYTAG® DISHWASHERS
Maytag dishwashers feature powerful cleaning performance and durable components. They're designed to handle tough messes, making post-meal cleanup a breeze. Select models include the PowerBlast® cycle, which scours away stubborn foods like egg yolk, peanut butter and even dried-on oatmeal with ease. Explore dishwasher types and dishwasher sizes to find one that fits your layout and household needs.

MAYTAG® PERFORMANCE LINEUP
POWER PACKAGES THAT GET THE JOB DONE
Explore Maytag® kitchen appliances designed to power through mealtime and cleanup and look good while doing it
